
To perform chemotaxis calculations using the SMART system, the user may define the chemotaxis areas either at the beginning of an acquisition or during post-processing, using the setup option “Analyze recorded experiments”.
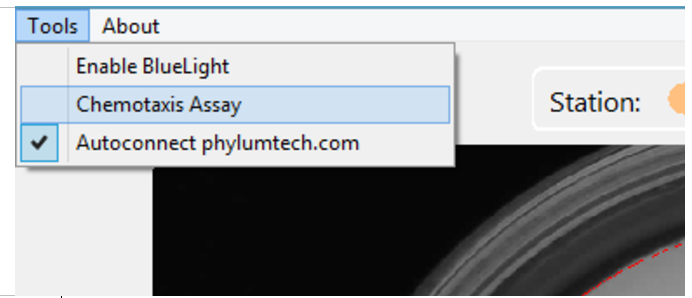
1. Activate the Tool
Go to:
Menu → Tools → Chemotaxis Assay
2. Set the Chemotaxis Area
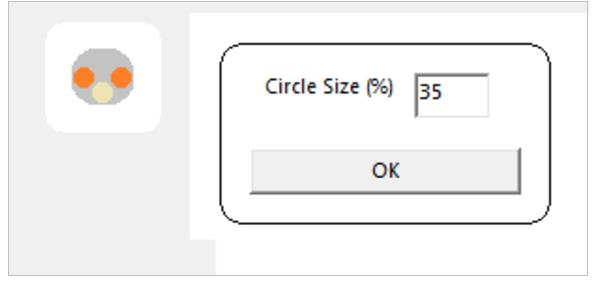
A schematic of the plate section will appear on the left. Click on it to open a menu where the circle size can be adjusted as a percentage of the total plate area.
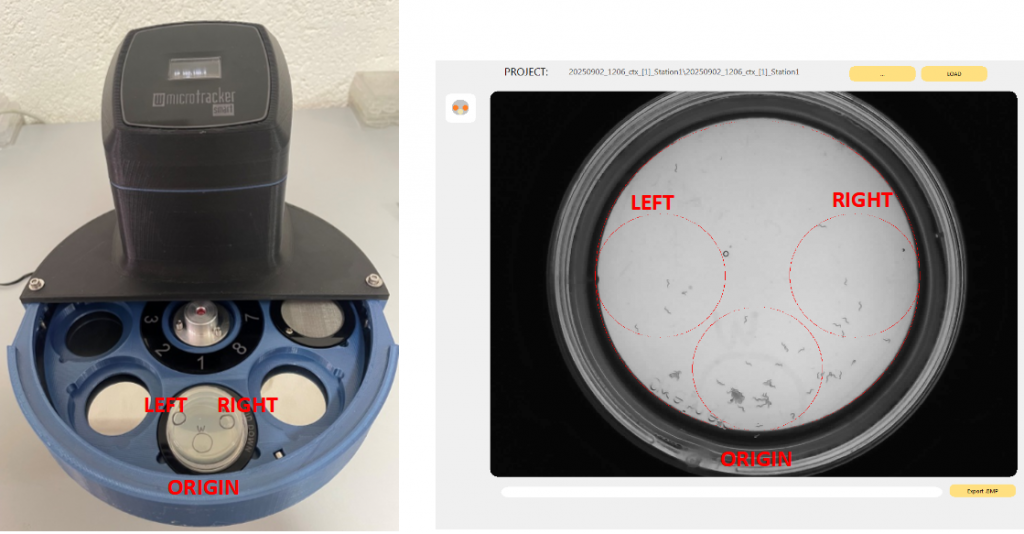
3. Plate Orientation and Spot Detection
When placing plates into the carousel, please keep in mind that the position of the spot will be determined as described below:
4. Start the Acquisition
Begin the acquisition and set the number of cycles required to monitor the entire chemotaxis process. For fast assays, we recommend:
- 1-minute acquisition lapse
- Multiple cycles
Report Output
When the Chemotaxis Assay Tool is enabled, the report will display: the fraction of particles detected in each defined area.
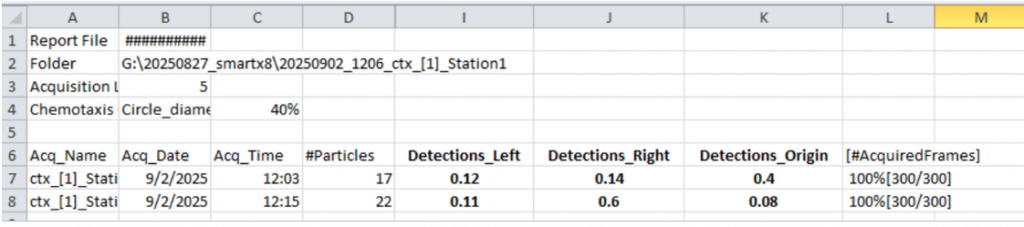
If you want to estimate how many worms were detected on average in a particular spot, simply multiply:
Particles × Detection_fraction
Example:
If #Particles
= 17 and Detection_fraction (left area)
= 0.12, then:
17 × 0.12
= 2 particles (worms)
detected on average in the left area.